
When I train machine operators, I tell them that, most likely, venting problems are the biggest cause of scrap parts they will come across. This statement was originally based on a survey conducted by the ARM many years ago. After 30 years in this business, the statement still holds true, as far as I’m concerned.
Creating scrap parts because of bad venting is totally avoidable. This is one aspect of rotomolding that absolutely isn’t rocket science (not much is, actually).
If you have inadequate venting, or if your vents block during the process, you will get parts with defects.
During the cooking stage, inadequate venting will create a build-up of pressure in the mold, as the air inside heats up and cannot expand through the vent. At some point in the cycle, molten plastic will be forced into the parting line (or any other potential emergency air release passage). The result will be the creation of flash along the parting line, which will need to be trimmed off.
Worse, inadequate venting in the cooling stage will create a vacuum in the mold, as the air inside cools down and cannot draw more air in through the vent to equalize the pressure. At some point in the cycle, air from outside will penetrate the parting line. The result will sometimes be bubbles along the parting line (on the inside of the part) or, more likely, a small hole where a bubble has formed and then burst. Either way, you’ve got a part that is either scrap, or else requires re-work.
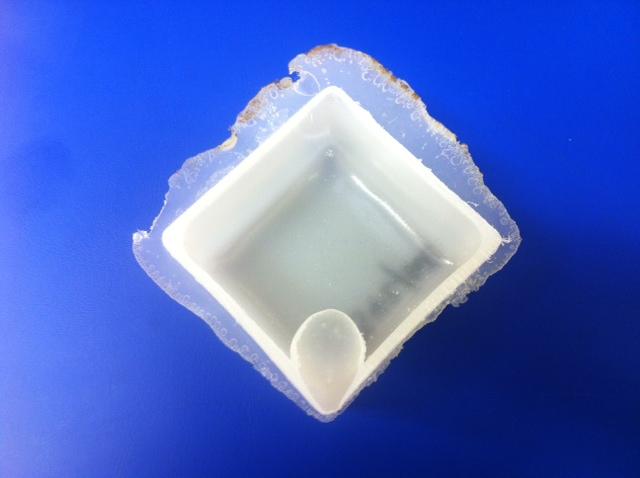
There’s a photograph below that illustrates both issues. This was made in a test mould I have that actually has no vent. You can clearly see the flash that was formed during cooking and the bubble that was created during cooling.
Horrible!. So how can you avoid this and, specifically, what constitutes adequate venting?
In the first instance, an “adequate” vent (or vents) has an opening that is large enough to allow adequate flow of air from inside to outside the mould, at all points in the cycle.
So far, I’ve not been able to find any sources of primary research into this, but there are a number of authorities that state rules of thumb relating vent diameter (note this is the inside diameter) to mold volume. These rules of thumb express themselves in various units, but the most useful way I’ve seen of expressing it is in terms of vent open cross sectional area (CSA) per mold volume. A typical number is:
0.01 in2 of vent open CSA per ft3 of mould volume
I’ve used this figure to calculate what this means, for various volumes of mold (see table). Note that this data relates to vents without packing. If you do use packing (wire wool, mineral wool, rolled-up scotch pads etc), I have seen recommendations that you double the CSA of the vent provided.
How can you estimate the mold volume?
- If your mold has been designed using computer aided design (CAD), the mold cavity volume should be directly available from the design file.
- If your part is a relatively simple geometric shape (eg a cylinder or box), you can roughly calculate it.
- Another idea would be to fill a finished part with water and weigh it.
- Either way, this doesn’t need to be exact; it’s a guide only.
Have a look at some of your existing molds and see whether, according to this table, you already have adequate venting. You may be surprised at what you find!
Happy rotomolding!
Dr Nick Henwood serves as the Technical Director for the Association of Rotational Molders. He has 30 years-plus experience in rotomolding, specializing in the fields of materials development and process control. He operates as a consultant, researcher and educator through his own company, Rotomotive Limited, based in UK.
Leave a Reply